SB updates
How to export your transaction history on Startbutton
Damilola Oyelere
Aug 7, 2026
3 minutes

Your accountant sends a message requesting the breakdown of last month's payment. Your finance team needs to reconcile incoming collections against outgoing transfers for the quarter. You're preparing for an audit and need a clean record of every transaction across multiple currencies and markets.
If you've ever found yourself jumping between screens, manually copying transaction details, or piecing together payment records from different sections of a dashboard, you already know how draining that process is. It shouldn't be that hard.
That's exactly why we built the "transaction export feature". With one click, input your desired filters in any format you want, and you can easily get it on the dashboard.
Who this is for
This feature is built for anyone who manages payment activity on Startbutton and needs visibility beyond the dashboard view, including:
Finance and accounting teams reconciling collections, transfers, and settlements across periods
Founders and CFOs preparing financial reports or investor updates
Operations teams tracking payment status across high-volume transaction periods
Anyone working with an external accountant or auditor who needs clean, structured payment data fast
What you can export
Before walking through the steps, it's worth knowing what the export actually covers. You can pull records for:
All transaction types: collections, transfers, settlements, conversions, and refunds
Any date range: from a specific week to your entire transaction history since you started using Startbutton
Specific currencies: filter by the currency that matters to you
Transaction status: successful, pending, failed, reversed, or all of the transaction statuses
File format: CSV or Excel, depending on what your accounting software or team prefers
How to Export Your Transaction History
Step 1: Log in to your Startbutton dashboard
sign into your dashboard with your account details.
Step 2: Navigate to the "Accounts" section
From the main navigation bar on your left-hand side, click on Accounts. This is where your full payment activity lives.
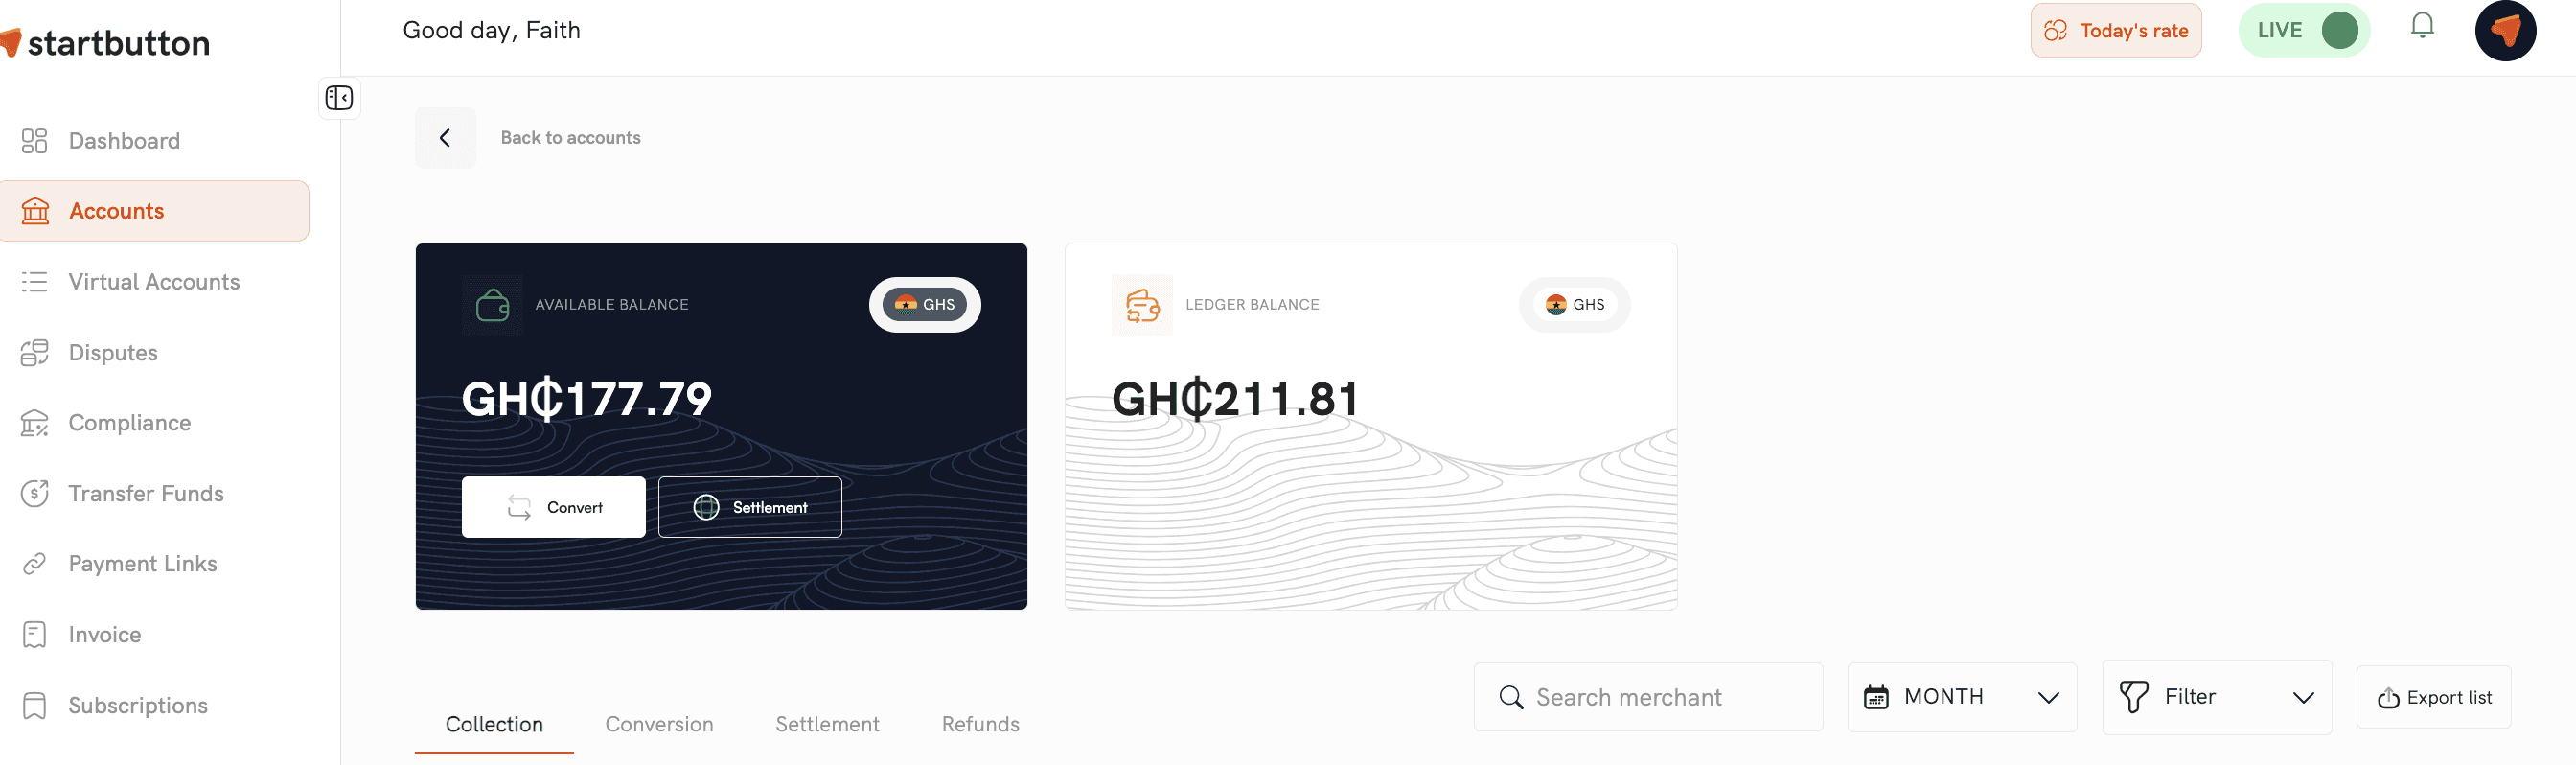
Step 3: Click "Export list"
Look to the far right corner of the Accounts section. You'll see an Export list button. Click on it.
Step 4: Set your filters in the Export Collection tab
An Export Collection tab will open. This is where you define exactly what you want to pull.
Your filter options include:
Date range: choose a specific start and end date, or select All time to export your full transaction history from day one
Transaction type: filter by collections, transfers, settlements, conversions, or refunds
Currency: select the specific currency or currencies relevant to your report
Status: filter by successful, pending, failed, reversed, or all statuses
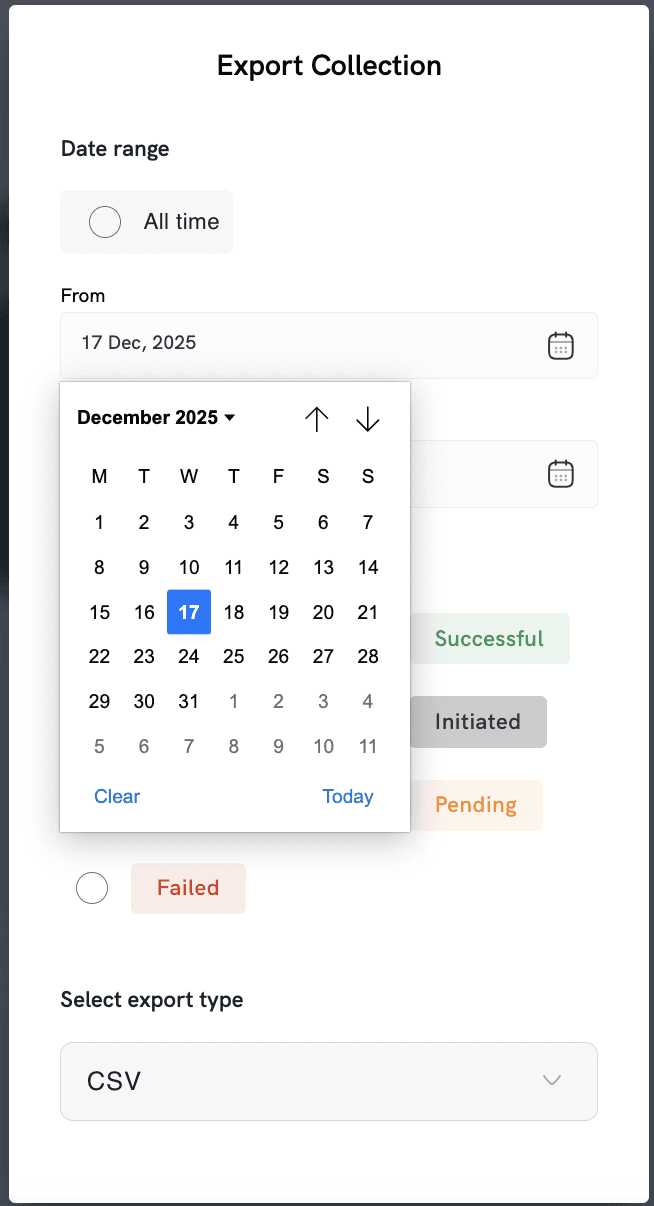
Apply the filters that match what you need. If you want everything, leave the filters open and select "All time".
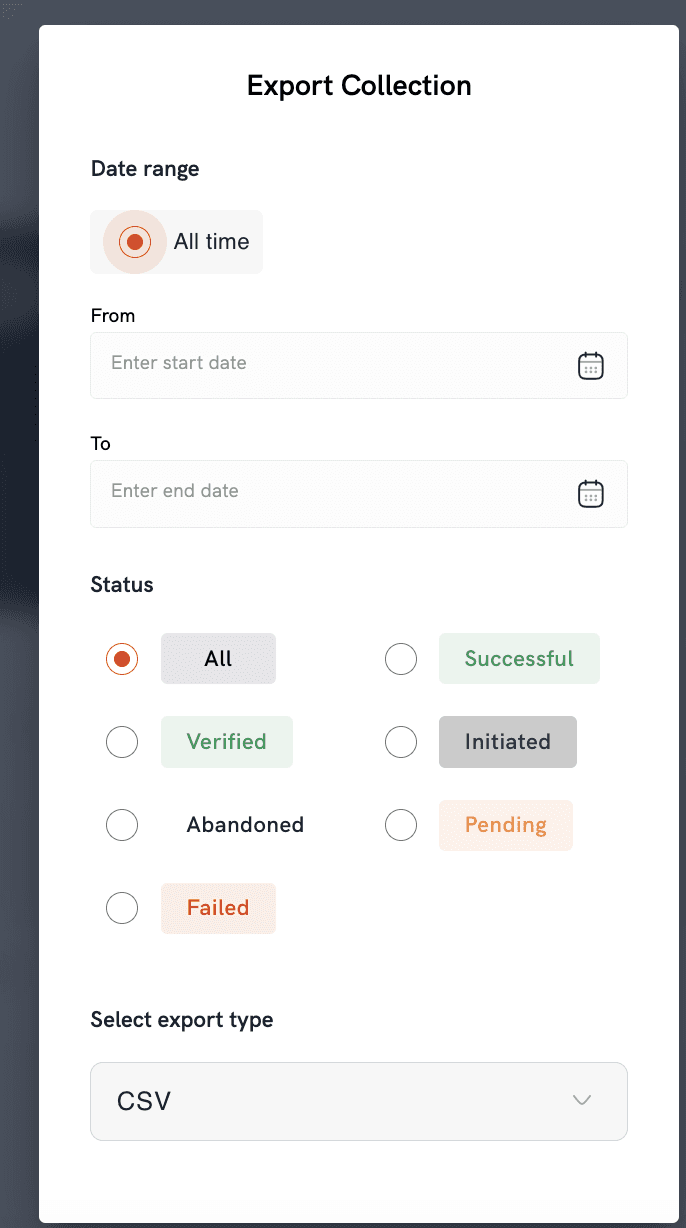
Step 6: Choose your file format
Select CSV or Excel depending on your preference or your accountant's requirements.
Step 5: Click "Export"
Once your filters are set, hit the Export button
Step 7: Your report downloads instantly
The file downloads immediately with all filtered transaction data included.
Note: for data containing fewer than 1000 records, you’ll be able to download it directly from your browser.
For data greater than 1000 records, you’ll receive the exported file directly via email.
A few scenarios where this saves time
Month-end reconciliation
Set your date range to the previous month, filter by all transaction types, and export. Hand the file directly to your accountant without pulling a single number manually.
Auditing a specific currency
Filter by a specific currency. Let's say, KES or GHS, and export only the transactions relevant to that market. This is useful when your finance team is reviewing a specific market payment performance.
Tracking a specific transaction type
Need to review only your refunds from the last quarter? Filter by transaction type (refunds), set your date range, and export.
Full historical review
Select "All time" with no additional filters to pull your complete transaction history since you started transacting on Startbutton. Useful for year-end reporting or onboarding a new finance team member who needs the full context of your business transaction history.
Quick Tips
Use CSV if you're working with accounting software like QuickBooks or Sage, most platforms import CSV files directly
Use Excel if you're sharing the report with a team that will work with it manually
Save your commonly used filter combinations: if you pull the same report monthly, remembering your filter settings makes the next export even faster
Export by transaction type if you need separate records for collections and transfers. It keeps your reconciliation files more organized
Your transaction history is yours. This feature just makes it easier to actually use it